
I love my work. I have two very different parts of one company, and each keeps me expanding my creative horizons. However, working for oneself can be nice, but working with other creatives can be very invigorating. For this reason, if I were to work for someone else, it would have to be as an Imagineer with Disney.
With this in mind, I'm going to demonstrate today one of the secrets of that wonderful experience, Disney's Haunted Mansion! Yes, I will reveal the secret of the haunted marble busts that watch visitors as they stroll, or ride, through the Mansion.
Before you ask, I don't think this will in any way spoil the experience for you. The Haunted Mansion is something one can enjoy over and over again, and while you are in there, you're too busy enjoying yourself to think, "oh, so THAT's how they do that!"
Here is a video clip I made, demonstrating the effect. Please enjoy it because it took 9 takes, and much of my patience, to create. :0)
Hope you saw that. So, the marble busts aren't marble busts after all! They are the negative, or reverse impressions of busts, turned around and lit from behind. The very subtle shadowing created by the back-lighting creates the illusion that the busts are three dimensional objects, and the shadows moving as you move create the illusion of movement. (say THAT three times fast!)
To make this work, the 'cast' of the 'bust' must be realistic, as seen in the first photo, and deep enough to capture the details of the face. Keep in mind that in the photo below, you are seeing an optical illusion... the face is actually facing away from you, but the light and shadows make a convincing 3-d appearance. The photos are all taken at different angles, but the face is still, so really does seem to be moving. The video shows this best, though... what appears to be a ghostly skull moving around and turning to face you!

A very convincing optical illusion, eh? By the way, today's model came from a paint it yourself plaque that came with a Pirates of the Caribbean model kit I got as a kid. Nothing like keeping it in the family. :0)
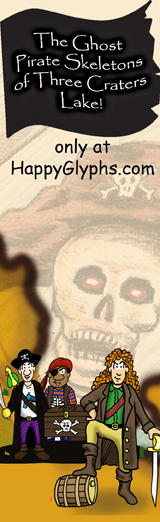
Hope you enjoyed today's lesson. Please check our homepage for my current comic experience, The Ghost Pirate Skeletons of Three Craters Lake, in which The Inquiring Minds create their own haunted Pirate Ride!
Cheers, JOHN :0)


6 comments:
Ah yes...I've seen that one done before. Still good though.
wow that's awesome! I didn't realize that's how it worked! well.. you learn something new everyday! Thanks for the post and and the cool pirate plaque!
That's neat.... Had no idea how these things worked, NOW I know... Thanks John.
Thanks for the comments, everyone! If you're interested to learn further, I have expanded the blog, and added a few more photos.
Cheers, JOHN ;0)
Nice demo. As a side note, that reverse plaque makes a nice sugar mold. I had one atop a birthday cake when I was quite young.
Excellent suggestion, Steve! Although I'd prefer to use chocolate. Sugar would probably be easier to color, though, or left white would work just right... for the skull and bones, anyways. :0)
Cheers, JOHN :0)
Post a Comment